In this article, I would be briefly explaining a technique used in sewing that is quite popular. It may seem difficult if you are a beginner in sewing but I promise you, it isn’t as hard as it looks and with time, you will come to enjoy it if you practice it in your sewing projects.
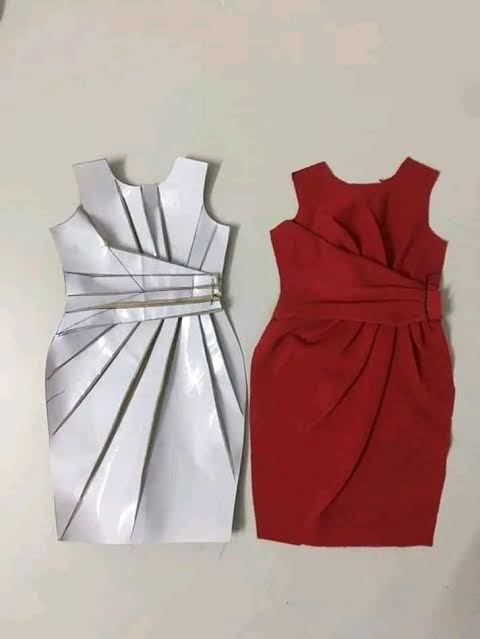
Splash and spread is a technique used to increase the desired amount or volume of fabric used in a segment of your sewing, without necessarily increasing the space allotted for the fabric to be joined to. With this technique, you can create fullness in your garment by having excess fabric at that point. You can use it to add pleats and gathers. or even sweep. This technique cannot be done without pattern paper and pattern drafting. With this technique, you’re gonna strategically slash your paper pattern to create more volume, so you can change the shape of a sleeve, a bodice, or even a dress. If you want a quick understanding of pattern drafting, click here.
Presuming your armhole round is 20 inches, with splash and spread, you can cut out your sleeves with 40 inches, use a gathers stitch to condense the weight to 20 inches and fit it into the armhole. The sleeve would fit into the armhole yet it would be much fuller than if it was cut at 20 inches width. A gathers stitch is not always used for splash and spread as sometimes the area of fabric it is applied to doesn’t need to be sewn into a segment. For example in a flare sleeve, splash and spread are applied to the bottom part of the fabric to open up the sleeves and make it fuller but you don’t need to gather the hems as it is simply folded and stitched.
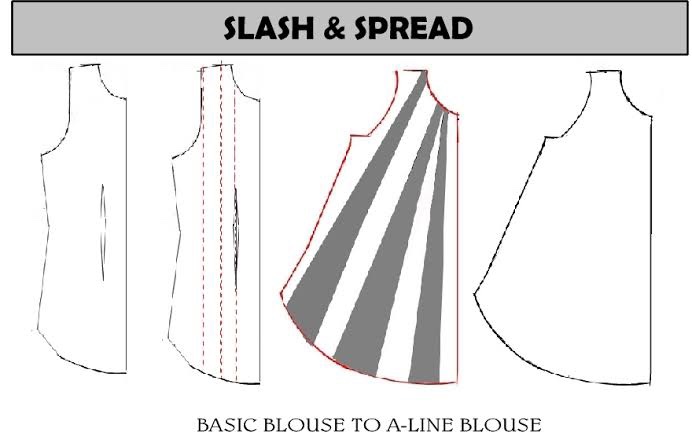
In the first image, you can see a basic bodice blouse with a dart intake. In the second image, there are notable lines. These lines can be made using between 1-2 inches intervals, depending on the volume you are hoping to achieve. The distance shouldn’t really be a bother as you can settle to use whatever works best for you. Then you cut through these lines. This is the splash technique. The next and third image is what matters, the spread technique. You are going to spread each segment apart. In this step, you can decide how much volume you need. The more the volume, the more distance it should be from one piece to another. After effectively being spread in the distance you desire, you can see in the last image that you have arrived at an A-line bodice blouse.
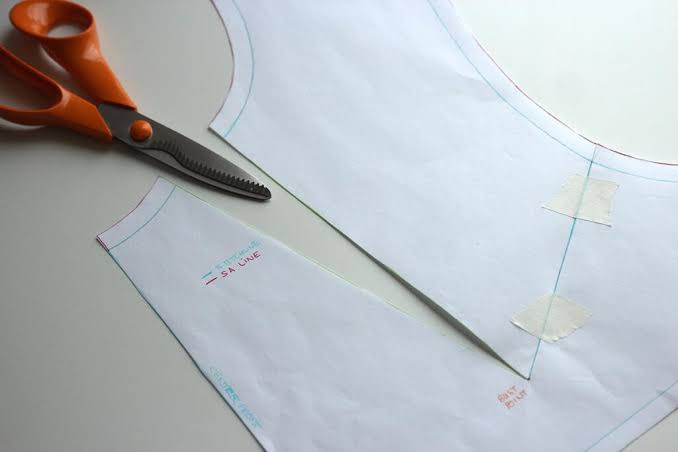
When you spread your pattern paper, you can use masking tape to secure it apart or on fresh paper so that you can recut the new pattern. You can also use the dart manipulation technique to fold in the spaces on the new pattern paper if you are using the splash and spread for darts on a dress.